
Technique
Router Basics for Edges
Clean edge profiles with a router: bit choice, depth in light passes, climb vs. conventional feed on outside edges, and simple bearing control.
Made in my shop
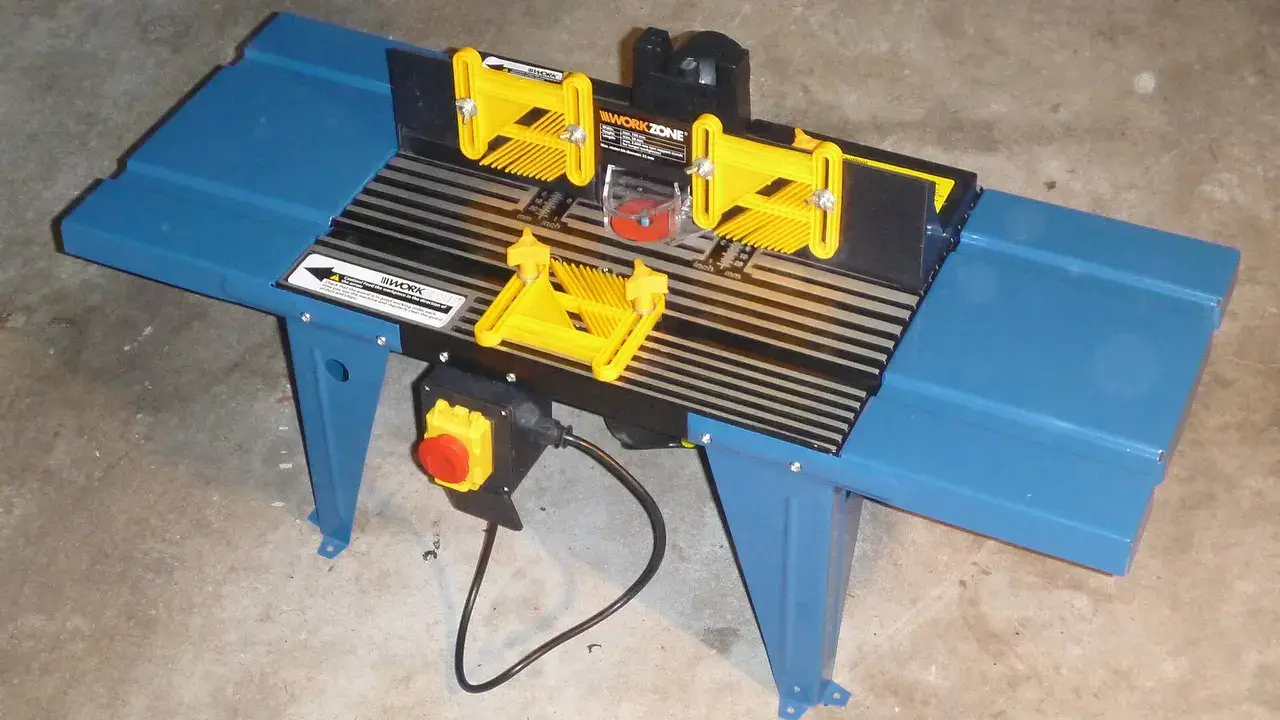
A router turns a square arris into a roundover, chamfer, ogee, or cove in a few controlled passes. The work is less about force and more about bit height, feed direction, and keeping the bearing or fence registered.
For speed, guards, and bit installation, start with using a router safely. This piece focuses on getting a clean edge profile.
On small parts, a block plane and a sanding block are often quicker: see easing and chamfering edges by hand.
Unplug before changing bits. Wear eye and hearing protection. Let the bit reach full speed before it touches wood, and stop fully before you set the router down.
Pick the bit for the job
- Roundover / beading: softens edges on shelves, tabletops, and frames. Bearing rides the finished edge.
- Chamfer: a flat bevel; adjustable depth changes the width of the chamfer.
- Cove: scoops a hollow; take lighter passes — more bite than a small roundover.
- Roman ogee / decorative profiles: prettier, more aggressive; sneak up on full depth.
Prefer ½” shank bits when your router accepts them — stiffer, less chatter. Match collet size; insert the shank fully then back off slightly per your router’s manual so the collet grips the shank, not the cutter transition.
Depth: sneak up on it
- Set the bit low for a first pass that defines the profile without loading the cutter.
- Rout all edges at that setting (or all that share the setup).
- Raise the bit and take another pass until you reach full profile.
Burning usually means the bit is dull, pitch-coated, spinning too fast for its diameter, or you’re feeding too slowly. Tear-out often means too deep a cut, wrong feed direction, or grain running out into the cutter.
Feed direction on outside edges
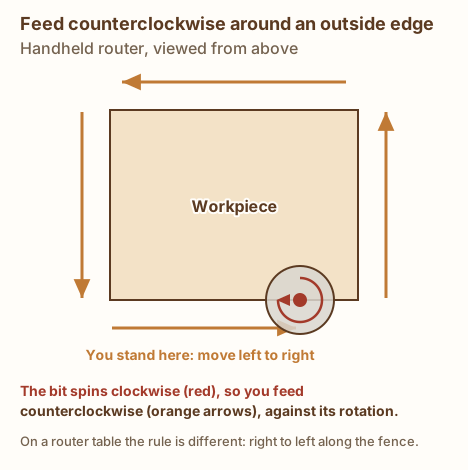
With a handheld router, the bit spins clockwise viewed from above. Move counterclockwise around the workpiece so you’re feeding against rotation on the outside edge (left to right as you face the edge you’re cutting).
On a router table, feed right to left along the fence (against the bit’s rotation as viewed from above).
A tiny climb pass (the opposite direction) can reduce tear-out on tricky grain, but it tries to pull the router — keep it very light and only when you already have control. Don’t climb-cut on a router table with hands near the bit.
Swipe sideways to see the whole diagram, or tap it to open full size.
Bearing-guided edges
For roundovers and many profiles, the bearing rides the same edge you’re shaping:
- The edge must already be straight and smooth; the bearing copies bumps.
- Keep the router base flat and the bearing tight to the edge without tipping.
- On corners, keep moving — pausing in one spot burns a divot.
End grain first, then long grain, is a common order: any blowout on the end is cleaned up when you rout the adjacent long edge. Test that order on scrap of the same species.
Fence or edge guide
When a bit has no bearing (or you’re cutting a rabbet to a set width), use the router’s edge guide or a straight board clamped as a fence. Measure bit-to-fence offset on scrap first.
Support and climbout
- Clamp the work so it can’t slide.
- Support thin stock so it doesn’t chatter.
- Rout into a sacrificial backer at the exit end of end-grain passes to limit blowout.
Common mistakes
- Full depth in one pass on a large profile.
- Feeding the wrong way and fighting a grabbing bit.
- Dirty bearings that transfer grit into the cut.
- Routing before the edge is jointed straight — the profile follows the wave.
Clean edges make finishing easier — see sanding progression and finishing schedules.
Sources & further reading
- Fine Woodworking — Upgrade your router with shop-built bases
- Your router’s owner’s manual for speed settings and bit installation
- Bit maker speed charts for large-diameter cutters
Our tool picks for this tip: Routers
Need a block plane? See our block plane picks.
Get new build ideas by email
Free build ideas and tips by email, about twice a month. We'll send a link to confirm. Our emails are sent by Kit, which tracks opens and clicks so we can see what's useful. Unsubscribe anytime. You must be 16 or older. Privacy policy.