
Technique
Crosscutting and Ripping Basics
How to choose a crosscut or a rip, set up for straight cuts, and keep parts square — on a table saw, miter saw, or with a circular saw and guide.
Made in my shop
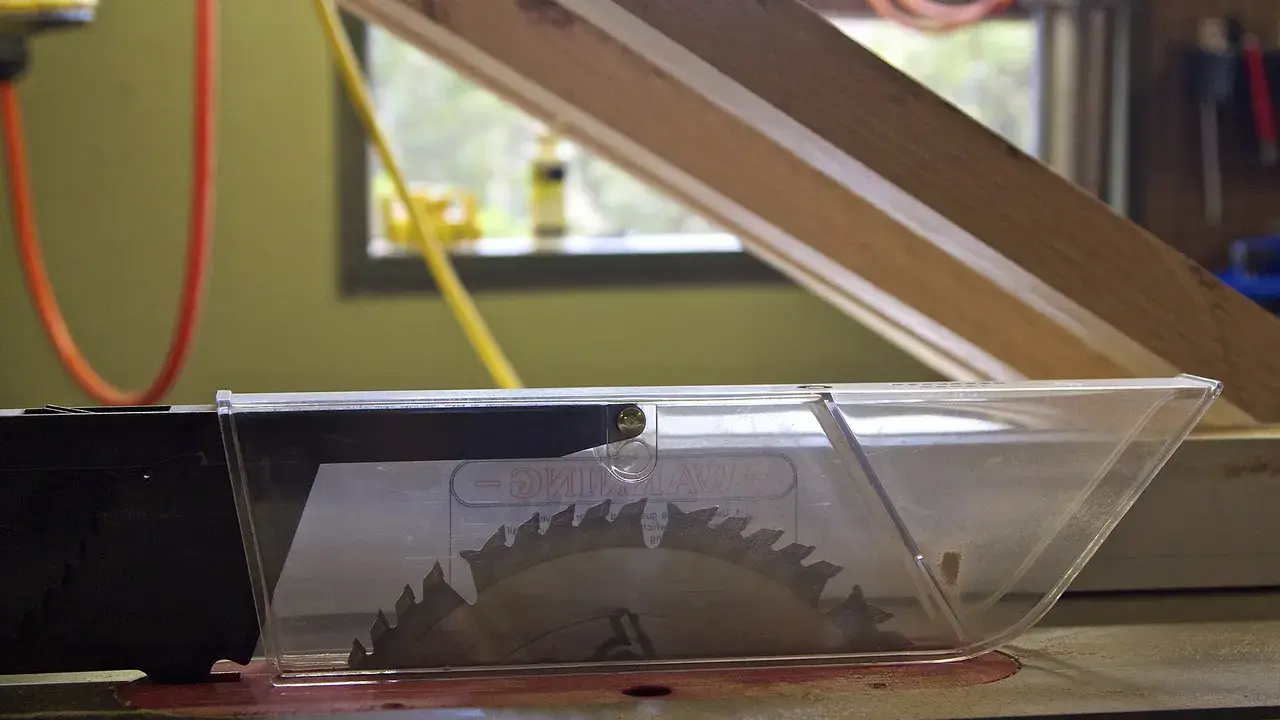
Every board you turn into a part gets cut across the grain (crosscut) or along it (rip). Knowing which cut you’re making — and setting up for it — is what keeps ends square, edges parallel, and waste under control.
Read your saw’s manual for blade guard, riving knife / splitter, and fence use. Wear eye and hearing protection. More in our shop safety essentials.
Crosscut vs. rip
- Crosscut: cut across the grain (shortening a board). Grain runs left-right as you face the cut; fibers are severed.
- Rip: cut along the grain (narrowing a board). The blade follows the fibers; a dull blade or a pinched kerf is more likely to burn or bind.
The same blade can do both, but a dedicated crosscut blade (more teeth) leaves a cleaner end, and a rip blade (fewer teeth, larger gullets) clears chips better on long rips. A combination blade is fine for mixed shop work.
Table saw: which face against what
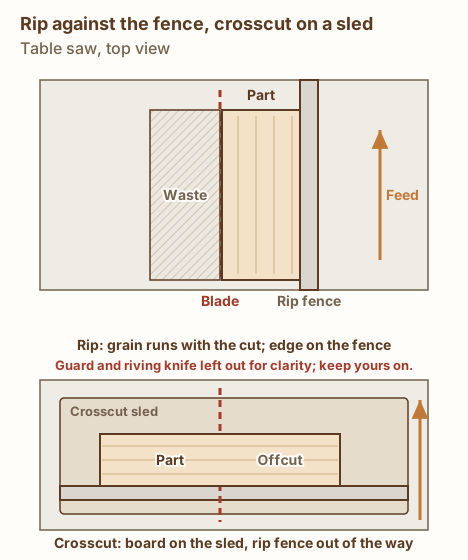
- Rip: reference edge against the fence. Set the fence to the finished width, not by measuring from the blade with a tape every time — measure once, lock, and cut matching parts the same way.
- Crosscut: use a crosscut sled or a miter gauge (with a sacrificial fence if you add a stop). Do not freehand a crosscut against the rip fence alone — the offcut can bind between blade and fence.
Keep the board flat on the table, feed at a steady pace, and let the blade reach full speed before the wood touches it. Use push sticks or push blocks as your saw’s manual directs for narrow rips.
Swipe sideways to see the whole diagram, or tap it to open full size.
Miter saw for crosscuts
A miter saw (or compound miter saw) is built for square and angled crosscuts. Support long stock so it doesn’t tip; hold the board firmly against the fence; and let the blade stop before you raise it. A stop block clamped to the fence (or to a sacrificial fence) makes matching lengths without remeasuring.
Circular saw with a guide
No table saw? A circular saw plus a straightedge clamped as a guide makes accurate rips and crosscuts:
- Mark the cut line.
- Account for the offset from the shoe edge to the blade (measure it once on a scrap).
- Clamp a straight board or aluminum guide at that offset.
- Keep the shoe tight to the guide for the whole cut.
Support the waste so it doesn’t break off and tear the last inch of the cut.
Square ends and parallel edges
- Check a crosscut with a combination square from a reference edge.
- After ripping, check that the new edge is parallel to the reference edge (measure width at both ends).
- Mark reference faces and edges so later layout always runs off the same surfaces — see measuring and marking accurately.
Common mistakes
- Ripping freehand without a fence or guide.
- Crosscutting with the rip fence as a stop on a table saw without a sled or proper stop setup — the trapped offcut is the hazard.
- Forcing a dull blade — burning, wandering cuts, and extra feed pressure usually mean the blade needs cleaning or replacing.
- Skipping support on long boards so the free end droops and the cut goes out of square.
Once parts are cut square, flattening and squaring (if you’re milling rough stock) and glue-ups without gaps get much easier.
Sources & further reading
- Fine Woodworking — Why make a wooden crosscut sled?
- Your table saw’s and miter saw’s owner’s manuals for guard, splitter/riving knife, and fence setup
Our tool picks for this tip: Miter saws
Need a circular saw? See our circular saw picks.
Not sure which push stick or push block to use? Read our push stick and push block guide.
Get new build ideas by email
Free build ideas and tips by email, about twice a month. We'll send a link to confirm. Our emails are sent by Kit, which tracks opens and clicks so we can see what's useful. Unsubscribe anytime. You must be 16 or older. Privacy policy.