
Technique
Sharpening Chisels and Plane Irons
A simple, repeatable sharpening routine: flatten the back, set a bevel, add a microbevel, and know when a tool is actually sharp.
Made in my shop
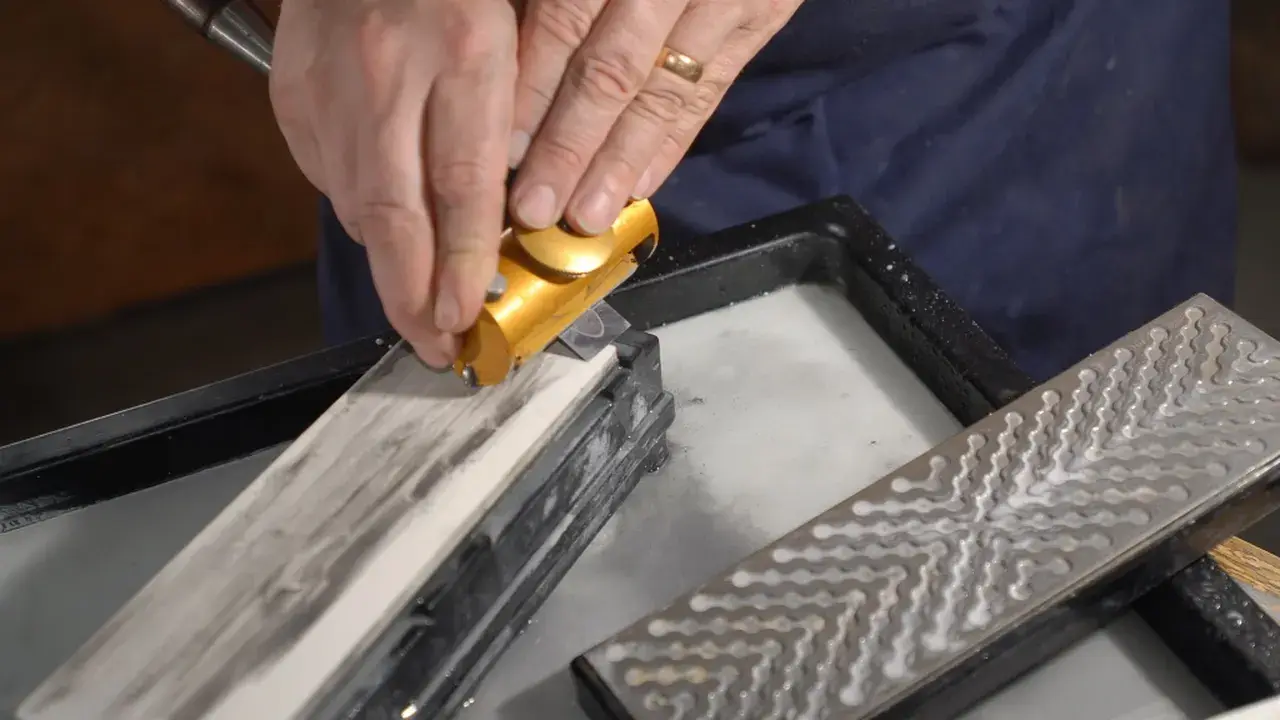
Dull tools slip, crush fibers, and make you push harder. Sharp tools cut with light pressure and leave a surface that needs less sanding. You don’t need a room full of gear — you need a flat abrasive, a consistent angle, and a habit of honing before the edge is ruined.
What “sharp” means here
A working edge is the intersection of a flat back and a bevel. If the back is rounded or scratched near the edge, no amount of bevel polishing will fix it. Once the back is right, small, frequent honing keeps the tool ready.
A basic kit
- Flat abrasives: diamond plates, water stones, or oil stones — coarse (around 300–400), medium (around 1000), fine (around 4000–8000 or a fine diamond). One coarse and one fine diamond plate will get you started.
- Honable guide (optional but helpful): holds a consistent angle while you learn.
- Strop (leather with compound) for a final polish, optional.
- Square and marker for checking.
Follow the stone maker’s instructions for soaking, lubrication, and flattening stones that dish.
Step 1: Flatten the back
Work only the inch or so behind the cutting edge (you don’t need the whole back mirror-flat on a long plane iron). Rub the back on your flat abrasive until scratches are even and the area right at the edge is polished through your grits. A permanent-marker scribble that disappears evenly shows you’re flat.
Step 2: Set the primary bevel
Common starting angles:
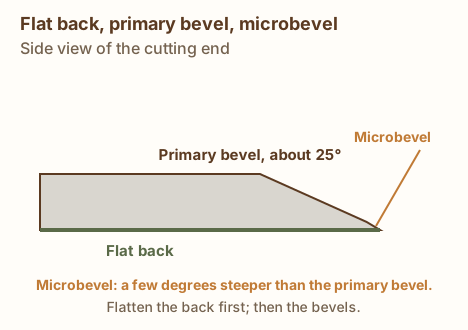
- Bench chisels: about 25° primary bevel; many add a steeper microbevel.
- Plane irons: often about 25° primary; the effective cutting angle depends on the plane’s bed angle too.
Use a guide set to your angle, or freehand once you can hold it. Grind or coarse-hone until you raise a burr (a tiny wire edge) along the back of the edge — feel it carefully with a fingertip off the edge, sliding from the back toward the edge.
Step 3: Microbevel
Raise the angle a few degrees (or add a thin secondary bevel with a short stroke) and hone on your finer stone until a fresh burr forms. This is faster to refresh later than regrinding the whole primary bevel.
Swipe sideways to see the whole diagram, or tap it to open full size.
Step 4: Remove the burr and polish
Lay the back flat on the fine stone for a light stroke or two to take off the burr, then alternate light bevel and back strokes. A strop can polish further — keep the angle so you don’t round the edge over.
The paper test (and others)
- Arm hair or paper: a sharp edge slices cleanly without tearing. (Be careful; this is a test, not a habit over your tools.)
- End grain on soft pine: a sharp chisel pares a continuous shaving; a dull one bruises and crumbles.
- Plane shavings: thin, continuous shavings and a glassy surface mean you’re there.
How often
Hone as soon as cutting takes more push or the surface dulls. A few strokes on a fine stone or diamond plate restores a microbevel in under a minute. Regrind the primary only when the microbevel grows large or the edge is nicked.
Plane-specific notes
- Camber (a slight crown) on a jack plane iron helps rough work; leave smoothing irons nearly straight with the corners eased.
- Seat the iron firmly and set projection with light taps — see your plane’s manual for depth and lateral adjusters.
Common mistakes
- Polishing a bevel while the back is still hollow near the edge.
- Rounding the edge on a strop by lifting the handle.
- Waiting until the tool is blunt — light, often honing is less work than a full regrind.
- Overheating high-carbon steel on a dry grinder; use light passes and cool often if you grind.
Sharp chisels make hand-cut joinery and mortise and tenon far more pleasant.
Sources & further reading
- Fine Woodworking — The facts of sharpening
- Your water-stone or diamond-plate maker’s care instructions
Need chisels? See our chisel picks.
Get new build ideas by email
Free build ideas and tips by email, about twice a month. We'll send a link to confirm. Our emails are sent by Kit, which tracks opens and clicks so we can see what's useful. Unsubscribe anytime. You must be 16 or older. Privacy policy.