Project plan
Roubo-Style Workbench
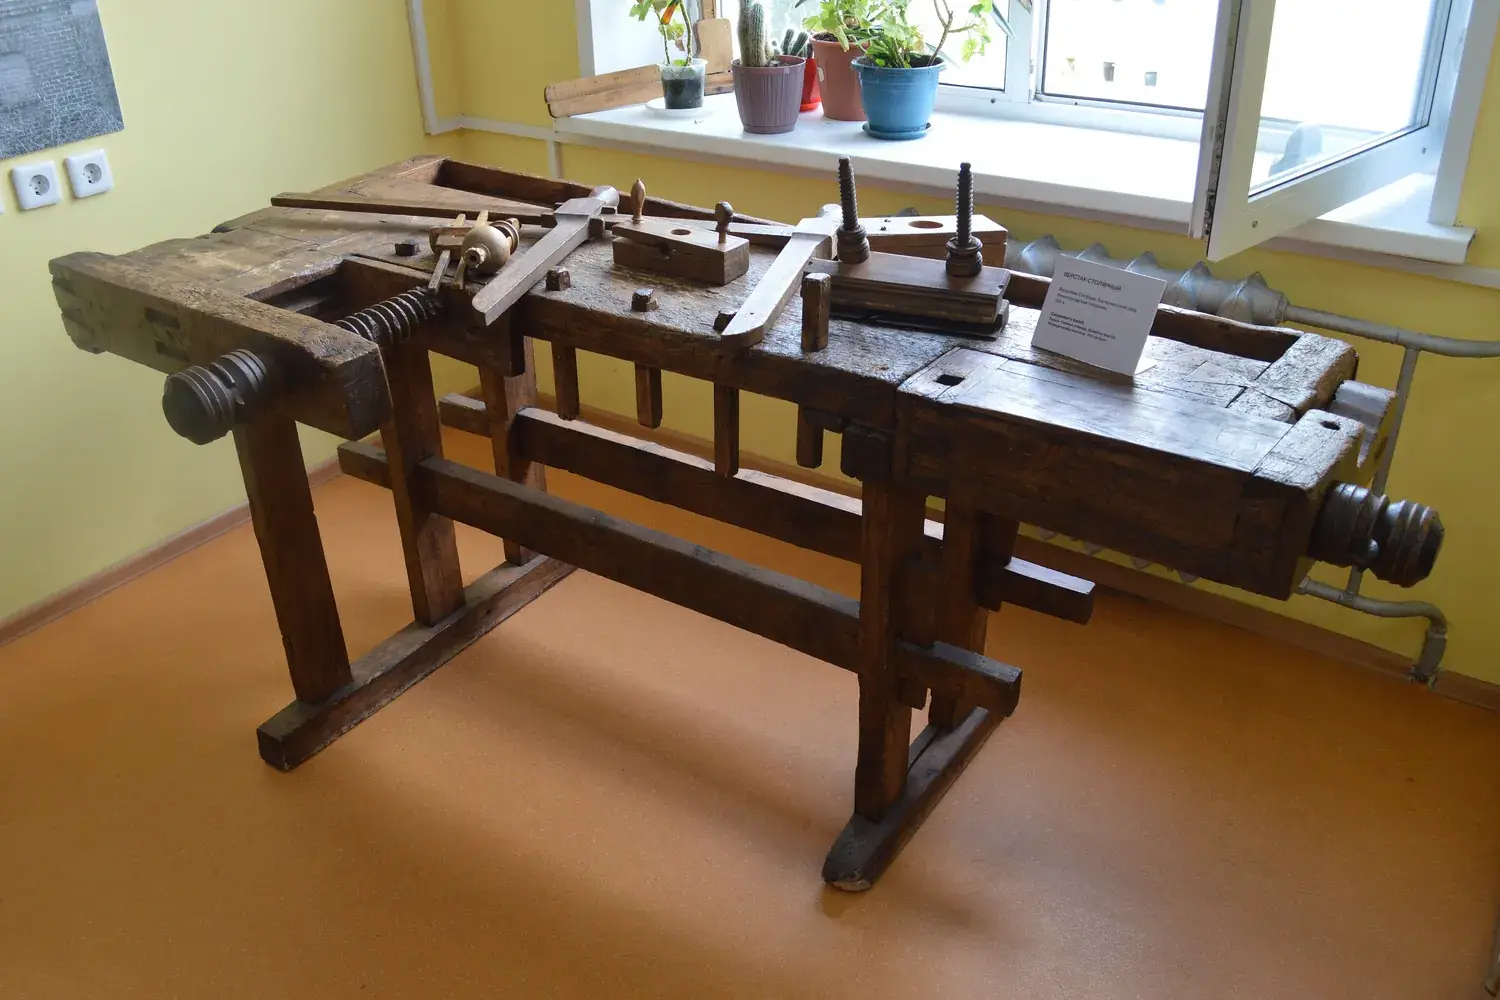
A massive, laminated-top workbench with legs flush to the front edge, through-tenons, and a leg vise — built from construction lumber. About 84" × 22" × 34".
- Difficulty
- Expert
- Estimated time
- 40–70 hours
- Estimated cost (rough)
- $250–$600
Tools
- Table saw or bandsaw (for ripping laminations)
- Jointer and planer helpful but not required
- Hand planes: jack or fore plane and jointer plane (for flattening the top)
- Circular saw with a guide, or large crosscut saw, for trimming the top
- Drill with 3/4" auger or Forstner bits, and brace or long bits for drawbore holes
- Mortise chisels or a drill and paring chisels; large tenon saw
- Router (optional, for cleaning up mortises)
- Lots of clamps — at least 8 bar or pipe clamps that open to 24"+
- Winding sticks and a long straightedge
- Safety glasses, hearing protection, dust mask — and a helper for lifting
Materials & cut list
| Part | Qty | Dimensions | Material |
|---|---|---|---|
| Top laminations Rip two per 2x10 × 8'. After jointing the glue faces they'll be roughly 1 3/8" thick, so 16 make a top about 22" wide | 16 | 1 1/2" × 4 1/4" × 88" (rough) | Southern yellow pine or similar 2x10 construction lumber |
| Leg laminations Glue in pairs to make four legs about 2 3/4"–3" × 5 1/4" × 34" (30" to the shoulder + 4" through-tenon) | 8 | 1 1/2" × 5 1/2" × 35" (rough) | 2x6 construction lumber |
| Long stretchers 56" between legs + 2" tenon on each end. Cut to your measured span + 4" | 2 | 1 1/2" × 5 1/4" × 60" | 2x6 construction lumber |
| Short stretchers About 16" between front and back legs + 2" tenon on each end. Cut to your measured span + 4" | 2 | 1 1/2" × 5 1/4" × 20" | 2x6 construction lumber |
| Leg vise chop | 1 | 2 1/2" × 7" × 32" | Hardwood or laminated construction lumber |
| Vise hardware | 1 | — | Leg vise screw with nut, plus a parallel guide (purchased or shop-made) |
| Drawbore pegs | 8 | 3/8" diameter | Straight-grained hardwood (oak or ash) dowels or riven pegs |
| Lumber to buy Spares allow for twisted or defective boards | 1 | 10 × 2x10 × 8' (8 yield the 16 laminations; 2 spares); 6 × 2x6 × 8' (4 for legs and short stretchers, 2 for long stretchers) | — |
| Glue and finish | 1 | — | PVA wood glue (plenty); a thin oil or oil/varnish finish |
Where to buy: not sure where to find these tools and materials? See our guide to stores and suppliers, from home centers and hardwood dealers to used-tool sources.
The Roubo-style workbench, named after the 18th-century French author and craftsman André-Jacob Roubo whose writings illustrate this type of bench, is a favorite among hand-tool woodworkers. Its defining features: a thick, heavy top; legs that sit flush with the front edge, so you can clamp long boards against the legs and top together; and big, simple joinery that stays rigid.
This version is built from construction lumber (like southern yellow pine) to keep costs reasonable. It’s an ideal project for practicing big mortise-and-tenon joints — see Mortise and Tenon by Hand — and for learning to flatten a large surface with hand planes (Flattening and Squaring Stock).
Overall size: about 84” long × 22” wide × 34” tall, with a top roughly 4” thick (a bit less after flattening). The legs are inset 8 3/4” from each end, giving 56” between them.
This bench is heavy. The top alone is a two-person lift (or more). Plan your glue-ups and assembly so you never have to lift it alone, and protect your back.
Cost is a rough estimate. Construction lumber prices fluctuate, and vise hardware ranges from inexpensive to premium.
Sources & further reading
Steps
Choose and acclimate the lumber
Pick the straightest, clearest construction lumber you can find, favoring boards with tight growth rings and no pith. Construction lumber is often wet, so stack it with spacer sticks in your shop for several weeks and check that it has stabilized before milling. Rushed wet lumber will twist and check after you've worked hard to flatten it.
Rip and mill the laminations
Rip each 2x10 into two strips about 4 1/4" wide, removing the rounded factory edges. Joint or plane the faces you'll glue so they're flat — this usually takes them down to roughly 1 3/8" thick, which is why you need 16 laminations rather than 15. Cut all laminations to about 88" long.
Glue up the top in sections
Glue the top in sections of three to five laminations at a time — a full-width glue-up with this much glue is very hard to manage. Keep the top edges level with cauls. Flatten each section's faces where they'll meet the next section, then glue the sections together. The final slab will be about 22" wide after the edges are jointed. If yours ends up a little wider or narrower, that's fine — the front-to-back stretcher length is taken from your actual top later.
Laminate and mill the legs
Glue the 2x6 pieces into four leg blanks. Mill them square and to the same size (about 2 3/4"–3" × 5 1/4") and cut them to 34" long. Orient them with the narrow (about 3") face toward the front of the bench. Mark the 30" shoulder line — that sets the bench height at about 34" with a 4" top. Adjust this to suit your own height before you cut anything. A widely used rule of thumb for a hand-planing bench is to put the top near the height of the knuckle at the base of your little finger with your arm hanging relaxed at your side; taller benches suit more joinery and detail work. If you're unsure, leave the legs long — it's easy to cut a bench down and hard to make it taller.
Cut the leg joinery
Lay out a through-tenon on the top of each leg, about 1 1/2" thick × 3 1/2" wide × 4" long (as long as your top is thick). Cut mortises in the legs for the stretchers: 3/4" wide × 4" long × 2" deep. Long stretchers go into the leg faces that point toward the other end of the bench, about 6" above the floor; short stretchers go into the faces that point toward the front or back leg, a few inches higher so their mortises don't intersect the long-stretcher mortises.
Cut the stretcher tenons
Measure the actual distance each stretcher must span (dry-fit the legs into the top or set them out on a flat floor at the final spacing) and cut each stretcher to that span plus 4". Cut 3/4" × 4" × 2" tenons on the ends of each stretcher, fitting each to its own mortise. Mark and number every joint. If you want the bench to be knock-down, you can use bed bolts in place of glued drawbored tenons.
Mortise the top for the legs
Flip the top upside down. The front legs sit flush with the front edge of the top and the back legs flush with the back edge, and all four legs are inset 8 3/4" from the ends (with 5 1/4"-wide legs on an 84" top, that puts 56" between the legs). Lay out the through-mortises from the leg tenons themselves, then bore out the waste and pare the walls square. Check often that the walls are square to the face so the legs stand plumb.
Assemble the base
Dry-fit the leg-and-stretcher frames. Drawbore the stretcher joints (bore through the mortise walls, mark the hole center on the tenon, then bore the tenon hole about 1/16"–3/32" closer to the shoulder, and drive tapered pegs) with or without glue. Then, with a helper, lower the top onto the leg tenons. Drive the top home with a heavy mallet and a block, and check that the legs are square to the top. Many builders wedge the through-tenons from above.
Flatten the top
Trim the ends square. Flatten the top with hand planes: remove twist first (checking with winding sticks), then work diagonally across the grain, then along the grain. Check with a long straightedge. It's a big job — take your time and keep your plane sharp.
Install the leg vise
Bore for the vise screw through the front-left leg following your hardware's instructions, mount the nut, and fit the chop. Add a parallel guide near the floor so the chop stays parallel to the leg as it closes.
Holdfast holes, planing stop, and finish
Bore holdfast holes in the top in a pattern that suits your work — use the hole size your holdfast maker specifies (3/4" is common). Install a planing stop near the left end. Finish with a thin coat of oil or oil/varnish blend so glue drips are easy to remove; avoid a slick film finish, which lets work slide around.