Project plan
Dovetailed Blanket Chest
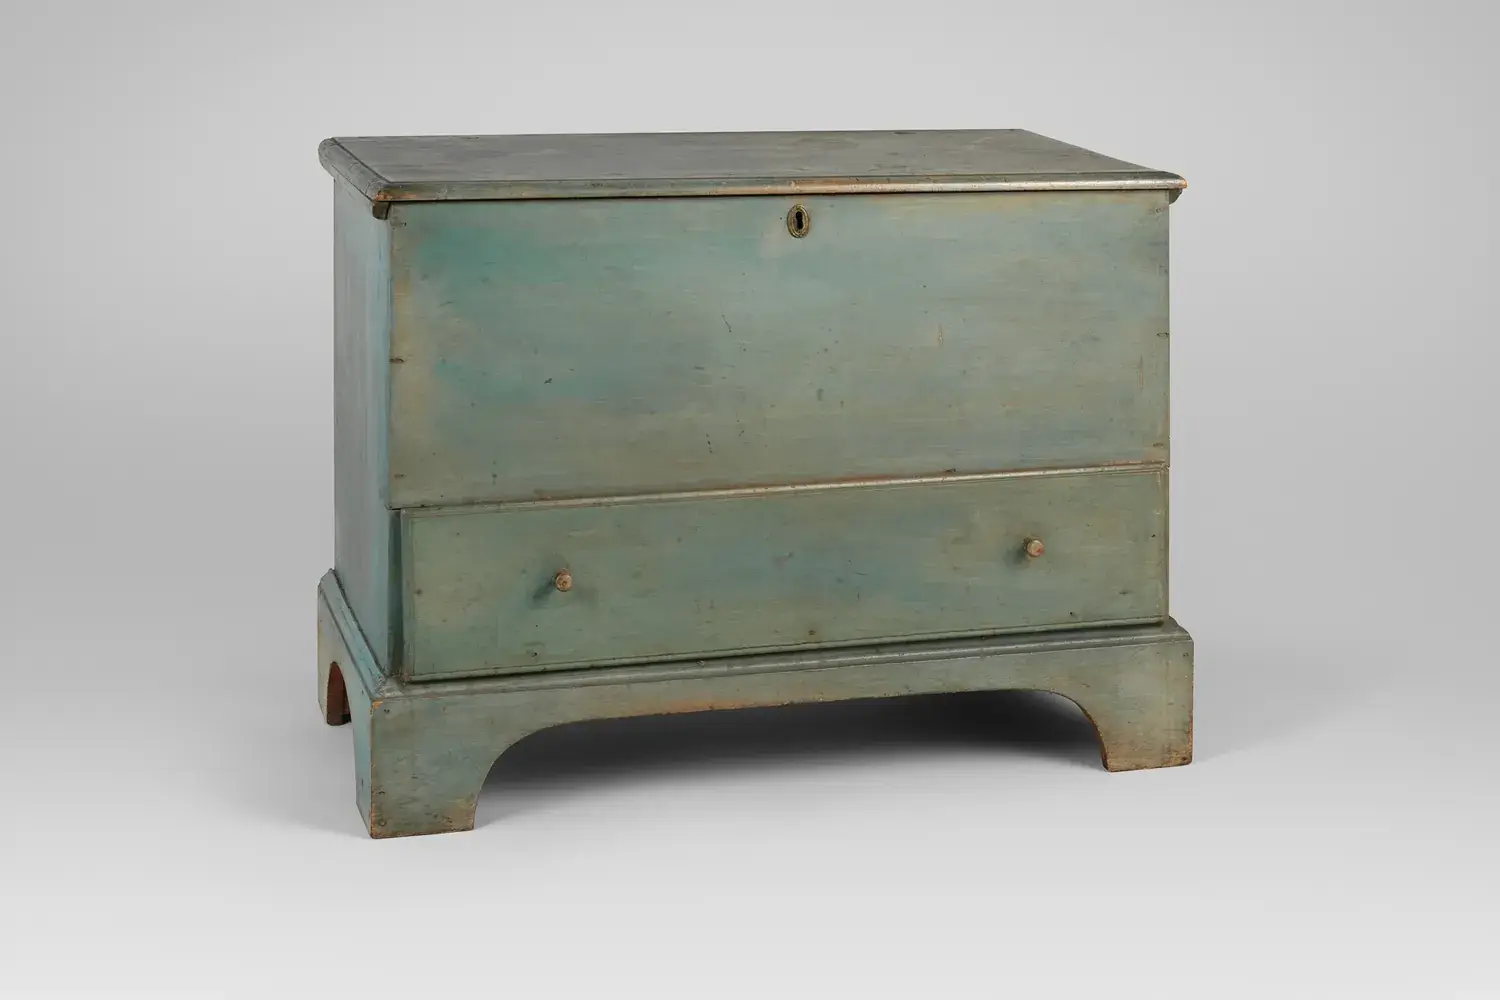
An heirloom chest with hand-cut through-dovetails, a mitered base, and a breadboard-end lid. Case 36" × 18" × 18".
- Difficulty
- Expert
- Estimated time
- 35–60 hours over several weeks
- Estimated cost (rough)
- $150–$550
Tools
- Jointer, planer, and table saw — or hand planes and a rip saw (or buy surfaced lumber)
- Dovetail saw, coping saw, marking gauge, marking knife, dovetail marker or sliding bevel
- Bevel-edge chisels (1/4" to 1") and a mallet
- Router with straight bit (for the breadboard groove and lid tongue)
- Miter saw or table saw with sled for the base miters
- Drill and 3/8" bit for the breadboard pegs
- Long bar clamps (at least 4 that open to 40")
- Smoothing plane and/or random-orbit sander, card scraper
- Safety glasses, hearing protection, dust mask
Materials & cut list
| Part | Qty | Dimensions | Material |
|---|---|---|---|
| Front and back Glue up from two or three narrower boards | 2 | 3/4" × 18" × 36" | Pine, cherry, or walnut (4/4) |
| Ends | 2 | 3/4" × 18" × 18" | Same as case |
| Bottom cleats (long) Glued to the inside of the front and back, flush with the bottom edge | 2 | 3/4" × 3/4" × 34 1/2" | Any hardwood or pine |
| Bottom cleats (short) Fit between the long cleats on the ends | 2 | 3/4" × 3/4" × 15" | Any hardwood or pine |
| Bottom Rests on the cleats with 1/16" clearance all around | 1 | 1/2" × 16 3/8" × 34 3/8" | 1/2" plywood (cedar-faced is a nice option) |
| Base front and back Length to the long points of 45° miters; gives a 1/4" reveal around the case | 2 | 3/4" × 4" × 36 1/2" | Same as case |
| Base ends Length to the long points of 45° miters | 2 | 3/4" × 4" × 18 1/2" | Same as case |
| Base glue blocks | 8 | 1 1/2" × 1 1/2" × 3" | Pine or poplar |
| Lid panel 32 1/2" between shoulders, plus a 1" tongue on each end | 1 | 3/4" × 19" × 34 1/2" | Same as case |
| Breadboard ends Overall lid: 37 1/2" × 19" | 2 | 3/4" × 2 1/2" × 19" | Same as case |
| Pegs | 6 | 3/8" diameter × 1" | Straight-grained hardwood dowel or riven pegs |
| Hardware For a chest that children may use, choose a support designed to prevent the lid from falling closed | 1 | — | Pair of chest or butt hinges, and a lid support/stay that holds the lid open |
| Lumber to buy The parts total roughly 22 board feet; the rest is allowance for defects and waste | 1 | About 28–32 board feet of 4/4 lumber | — |
Where to buy: not sure where to find these tools and materials? See our guide to stores and suppliers, from home centers and hardwood dealers to used-tool sources.
A blanket chest is a showcase for hand-cut dovetails: four big corners, each one visible and each one holding the whole case together. It’s a serious project, but it’s a fairly simple box at heart — and one that can be passed down for generations.
Before you start, cut several practice joints using the workflow in Hand-Cut Dovetails, and read Designing Furniture for Wood Movement — this plan uses breadboard ends on the lid for exactly the reasons explained there.
Overall dimensions: the case is 36” long, 18” deep, and 18” tall. The base adds 4” (the case sits on top of it), and the lid adds 3/4”, for a total height of about 22 3/4”.
About the design: every case panel has its grain running horizontally, so the dovetailed corners and the bottom cleats all move together — no cross-grain conflicts. The plywood bottom is dimensionally stable, and the solid-wood lid is free to move inside its breadboard ends.
Safety: a heavy lid that slams shut can hurt fingers — and children have been seriously hurt by falling chest lids. Always install a lid support that holds the lid open in any position or prevents it from falling, and follow the hardware maker’s instructions.
Cost is a rough estimate: the low end assumes pine, the high end a hardwood like cherry, plus hardware and finish.
Sources & further reading
- U.S. CPSC — Dangers with toy chest lids (why a lid support that holds the lid open matters)
- Popular Woodworking — Dovetail layout: what ratio or degree?
- USDA Forest Products Laboratory — Wood Handbook, Chapter 4 (wood movement behind the breadboard lid)
Steps
Mill and glue up the panels
Mill all case stock flat and to a consistent 3/4" thickness. Glue up the front, back, and ends from narrower boards, arranging the grain so the seams are hard to spot. Flatten the panels and cut them to final size: front and back 18" × 36", ends 18" × 18". The ends of every case panel must be dead square — any error shows in the dovetails.
Lay out the dovetails
This plan puts the tails on the end panels so the dovetails show on the sides of the chest. Scribe baselines 3/4" (the board thickness) from each end of all four panels. Lay out the tails on the end panels: half-pins at the top and bottom edges, with about five to seven tails across the 18" width. Mark waste clearly.
Cut the tails
Saw the tails on the waste side of the lines, remove the waste with a coping saw, and chop to the baselines from both faces. With wide panels, a twin-screw vise or clamping the panel to the bench front helps hold it steady.
Transfer and cut the pins
Stand each front/back panel in the vise, lay the matching end panel on it with the baseline aligned to the inside face, and knife around the tails. Saw and chop the pins, keeping the knife lines on the pins. Test-fit each corner gently and pare where it binds.
Dry-fit the case and fit the cleats
Dry-assemble the case to check that all four corners close and the case is square. Glue the long cleats to the inside of the front and back flush with the bottom edges, then glue the short cleats to the ends between them. All the grain runs the same direction, so these can be glued along their length.
Glue up the case
Sand inside faces before glue-up. Glue the dovetails, assembling one corner at a time, and clamp with cauls that press on the tails (not on the protruding pins). Check the diagonals and adjust until they're equal. When dry, plane or sand the pins and tails flush.
Install the bottom
Cut the plywood bottom to 16 3/8" × 34 3/8", drop it onto the cleats, and fasten it with a few screws down into the cleats.
Make the base
Cut the base parts with 45° miters at both ends, checking your saw's angle on scrap first. Optionally, cut a simple bracket-foot profile on the lower edge of each piece. Glue up the mitered frame (band clamps help), and glue two blocks into each inside corner area for strength. When dry, set the case on the base — the base sticks out 1/4" past the case all around, so the outer 1/2" of each case wall bears on the base — and screw up through the glue blocks into the bottom cleats. Measure your actual case before cutting the miters; if it came out a little bigger or smaller than 36" × 18", add 1/2" to each measured length.
Make the breadboard lid
Glue up and flatten the lid panel. Cut a 1"-long, 1/4"-thick tongue on each end, centered on the thickness, using a router or table saw; the shoulders are 32 1/2" apart. Cut a matching 1/4" × 1"-deep groove along each breadboard end. Fit the breadboards so they slide on with hand pressure. Some makers leave the breadboards a hair longer than the panel is wide so seasonal swelling doesn't leave the panel proud of them.
Peg the breadboards
Drill three 3/8" peg holes through each breadboard and tongue: one at the center, and one about 2" from each edge. Remove the breadboard and elongate the two outer holes in the tongue (about 1/4" longer toward the panel edges) so the panel can move. Glue only the center few inches of the tongue and the center peg; drive the outer pegs without glue in the tongue.
Hang the lid
The lid is 37 1/2" × 19" and overhangs 3/4" at the ends. Position it so it overhangs the front by about 3/4" (leaving about 1/4" at the back — adjust to suit your hinges). Mortise in the hinges following the hinge manufacturer's instructions, and install the lid support so the lid stays open on its own. Check that the lid closes without binding.
Finish
Remove the hardware, finish-sand, and apply your finish — an oil/varnish blend or brushed varnish works well. Many makers leave the inside unfinished or use only shellac so a closed chest doesn't trap finish odor; if you line it with aromatic cedar, leave the cedar unfinished. Reinstall the hardware once the finish has fully cured.